Recently the web was buzzing about how multitouch technology was implemented unofficially on the G1 Android. While admittedly it’s still not as smooth as I like it to be, its just a proof of concept and will probably be optimized over time. There are a lot of guides on how to implement it out there, am not bringing you anything new. But I haven’t seen one that actually explains the reasoning behind each step, and most guides are fragmented over multiple pages and links.
Before I start this howto, I must tell you that this hack doesn’t just give you multitouch, it actually opens up the possibilities wide open for you. You can change your theme, tether (use your phone as a wireless modem), auto-rotate, get a fully operable task manager…and much much more! So if you aren’t really interested in multitouch, this guide might also be of great value for you :).
Rolling Back From Version RC30 to RC29
In order to get all these goodies, you need to have ‘root’ access, or in other words FULL control over your phone as an administrator. Understandably, T-Mobile has taken away root from us; because one can inadvertently ruin the whole system.
However, version RC29 had a very weird and curios bug: anything you type on the keyboard is passed onto the command shell as root! It literally interprets everything you type as command-line operations. So if you type the word reboot in an SMS and then press enter, your phone WILL reboot!
Google quickly pushed out an update (RC30) to patch up this vulnerability; but this same bug is the basis of almost all hacking going on right now on the Android. So before you can really get down and dirty with your phone, you will need to roll back to RC29 and “root your phone”.
If you are already on RC29 then you can skip this step.
**WARNING: rolling back will erase ALL your data, settings, applications..etc. Basically you will end up with a factory phone. So I would recommend that you backup everything on your phone using an application readily available in the market called MyBackup. Backup your call log, bookmarks, SMS, MMS, system settings, and home shortcuts using the ‘Backup Data’ option. I don’t think you really need to backup your contacts since they are already available on your Google account (the cloud), plus I read complaints that restoring contacts would result in duplication, so I would just steer away from it. Also backup your applications using the ‘Backup Applications’ option. Finally backup everything on your sdcard, just drag and drop everything there on a folder on your desktop. **
Once backed up,
- You will need format your sdcard, so fire up Gparted (or any other partitioner). Delete the partition on your sdcard (in my case /dev/sdh) and create a new FAT32 partition, hit apply. If you are on Windows you can just right click on the sdcard in My Computer and format as FAT32.
- Download the RC29 NBH file if your phone is from the US or the RC7 NBH file if your phone is from the UK.
- Unzip RC29NBH.zip/RC7NBH.zip and place DREAIMG.nbh file on your sdcard’s root
- Turn the device power off
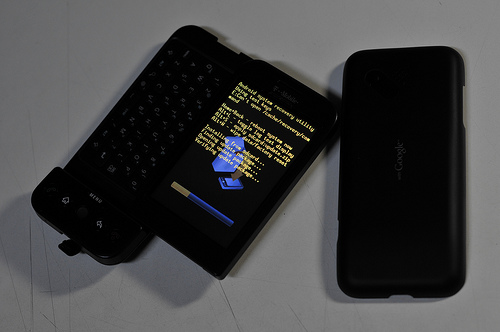
- Hold Camera button, and press Power button to enter Boot loader mode
- After it finishes, press the trackball and perform a soft reset by pressing “Call” + “Menu” + “End” to reboot.
Once loaded, you will have the phone rolled back to RC29 and have the basic desktop you had once you bought the phone. Now remember the bug that I told you about earlier? This is where it comes in handy, press twice anywhere, then type and then again. You just launched the telnet daemon on the phone! All you need is to install a telnet client and you are the God of your phone :)!
Multitouch Courtesy of Lukehutch and Co
Video taken off original link
Lukehutch is credited for hacking the Android and getting multitouch, you can read more about it over here. But, in order to get multitouch and other goodies, you need to upgrade your RC29 phone to something called JesusFreke V1.4. It is basically the same Google operating system with a few added hacks here and there packaged into its own ‘image’ by JesusFreke. Lets start shall we?
- Download JF’s RC30 v1.41 ROM for US users or JF’s RC8 v1.41 ROM for UK users. Do NOT unzip it! Just rename it to ‘update.zip’ (NOT update.zip.zip) and place it in /sdcard.
- Download the modified recovery and unzip it. Place the file “recovery_testkeys.img” in /sdcard
- In the telenet terminal we opened earlier type the following (Double check everything! You are root!)
mount -o remount,rw /dev/block/mtdblock3 /system
rm -f /system/recovery.img
flash_image recovery /sdcard/recovery\_testkeys.img
- Turn off your phone and turn it on again and wait until you are fully booted onto your desktop (you must do this)
- Turn it off again, then press the Home button and the Power button (keep holding the home button until the recovery console appears)
- When you enter the recovery console, press ‘alt+L’ then ‘alt+s’. This will flash the update.zip file that you downloaded and placed there. Wait until it finishes and prompts you to restart. Home + Back should reboot. Thats it! Now you got a fully modded phone with multi-touch, full root access, the full power of Busybox, and the flexibility to do much much more!
Bring Out the Task Manager
One of the main gripes I had with the unmodded version of the G1 was my inability to terminate apps that am done using. No one likes a stray app hogging their memory, and we couldn’t do anything about it! It was like having our hands tied to our backs. Not anymore! With JesusFreke image, you can install a task manager straight from the Android market! Just search for “Task Manager”
Tether The Hell Out of Your Phone
Tethering is just simply using your phone’s 3G connection on your laptop. It can be done via USB, Bluetooth, or even wireless. Here is the method I use:
- Turn off wireless on your phone
- Download tether-1.6.tar and place it in /sdcard via USB cable
- Unmount the sdcard and disconnect the USB
- In your terminal type:
su
tar xf /sdcard/tether-1.6.tar
tether start
Now go to your laptop or wireless device and search for new wireless networks. Connect to ‘G1’!
To stop tethering:
tether stop
Reading Arabic
Arabic text (and Hebrew I believe) is very troublesome. First of all Arabic is a right-to-left language, plus the way letters are drawn differ depending on the letter’s location in a word.
On the G1, Arabic text would appear as boxes and isn’t understandable at all. However, Rashed2020, a Qatari developer managed to get the G1 to recognize the text, but not the changing shapes. As a result each letter is printed separately, but at least this way you can understand what the text is saying!
- Download Update.zip
- Unzip and place it /sdcard
- Turn off your phone, and turn it back on while pressing home
- Install the image by pressing “alt+L” and then “alt+s”